When most jewelry makers start out in the craft, professional results and finishes are often just out of reach. But cut yourself some slack. It’s very difficult to achieve a perfect design, perfect fabrication, and a perfect finish while you are also simultaneously learning how to do all those things. Making professional work means investing lots of time and training, and when you first start out you usually don’t possess those things. As they say, practice makes perfect, but it also helps that there are so many tools, tricks, and techniques that can help you to get there faster.
I remember a time when I really didn’t care too much about the surfaces or edges of my work because I was more interested in seeing if I could manifest the idea in my head and figure out a way to fabricate it. The excitement of getting a “finished” thing to hold in my hands was more of a priority to me than making that “finished” thing look perfect. But for the past few years, I have noticed I’ve become so much more finicky about removing nearly microscopic slivers of metal along an edge that, to my eye, is just not perfect enough. I am reluctant to just “let it go” when I am not completely happy with a transition, curve, or corner, and I seem to have built up a nearly endless reserve of patience for getting a piece of jewelry metal to be exactly the way I want it to be. Whether this is maturity or mastery I do not know. All I can say is that it matters to me now.
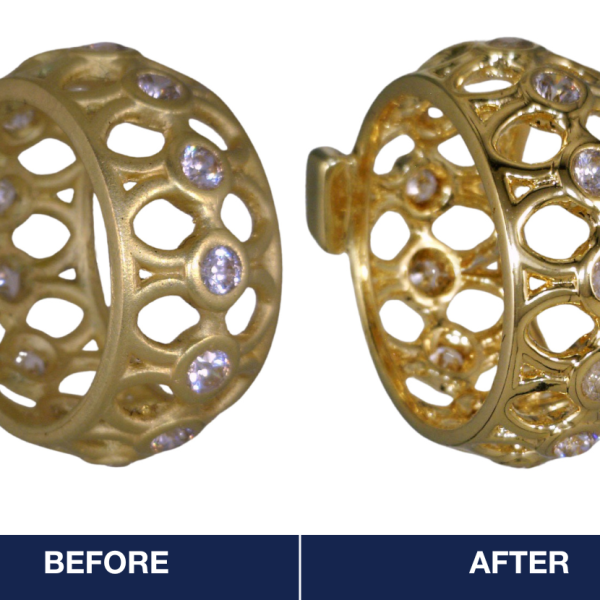
So, about those edges: saw blade marks are probably my Public Enemy Number One. Oh, how I hate to see them, and when I look at the edges of old work, I cringe and wonder how in the world I could have not seen those hideous ridges and scratches all over my work way back then. As a teacher, I now consider it my moral obligation to strongly encourage students to see those marks and get rid of them on their work. These days, I will do everything in my power to eradicate saw blade marks and I will file, scrape, sand, burnish and polish them to oblivion, only stopping when there’s an even, shiny glint of reflectivity all the way around the piece. Sure, this process is time consuming by hand and I am glad to have spent time learning how, but the flex shaft offers several ways to achieve nearly the same results in less than half the time.
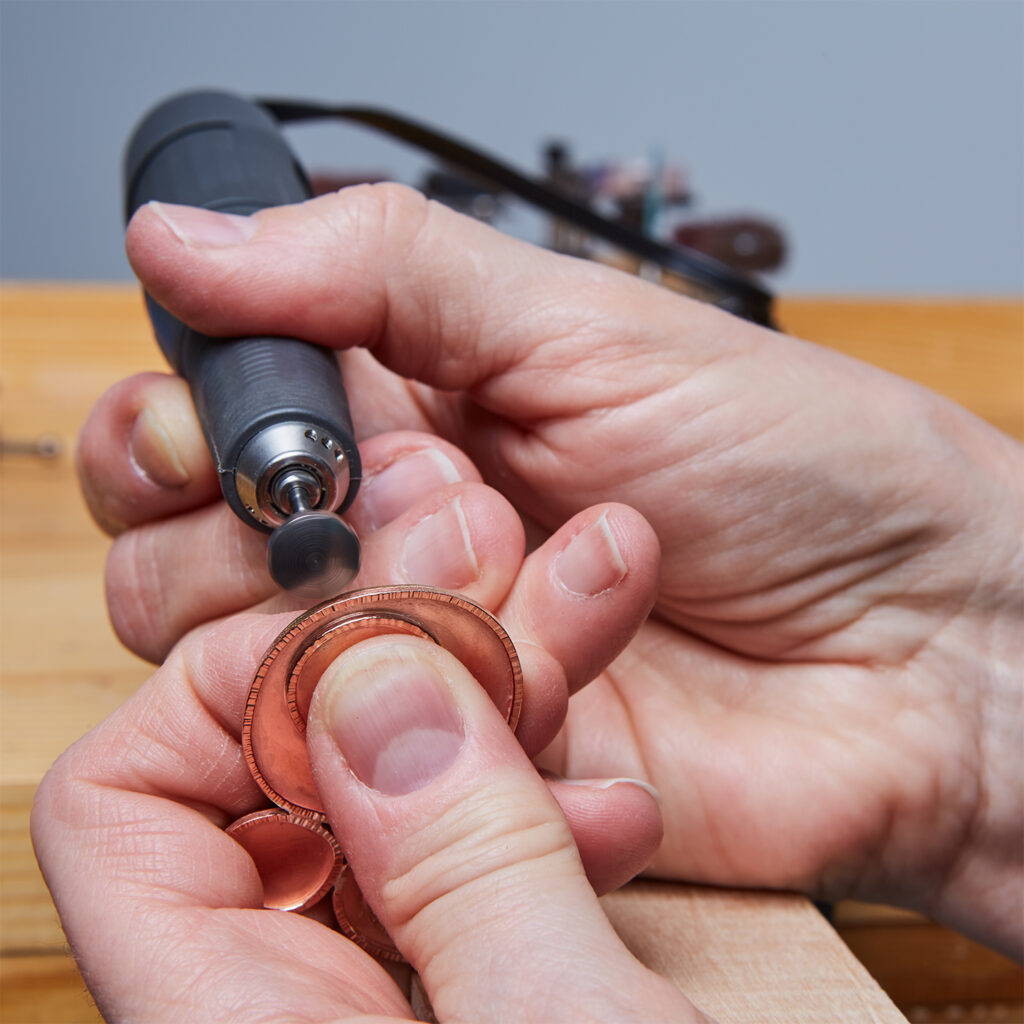
 My personal arsenal of edge finishing attachments includes rigid and flexible abrasives, brass and steel brushes, a handmade burnishing tip or two, and a new and wonderful attachment I have recently discovered for compacting both surfaces and edges of cast or fabricated jewelry metal. I’ve just started using a surface compactor (2601777) for smoothing the metal edges of some containment bezels for resin that I’ve fabricated from 18-gauge textured square wire and 20-gauge sheet and let me tell you, it’s a game-changer.
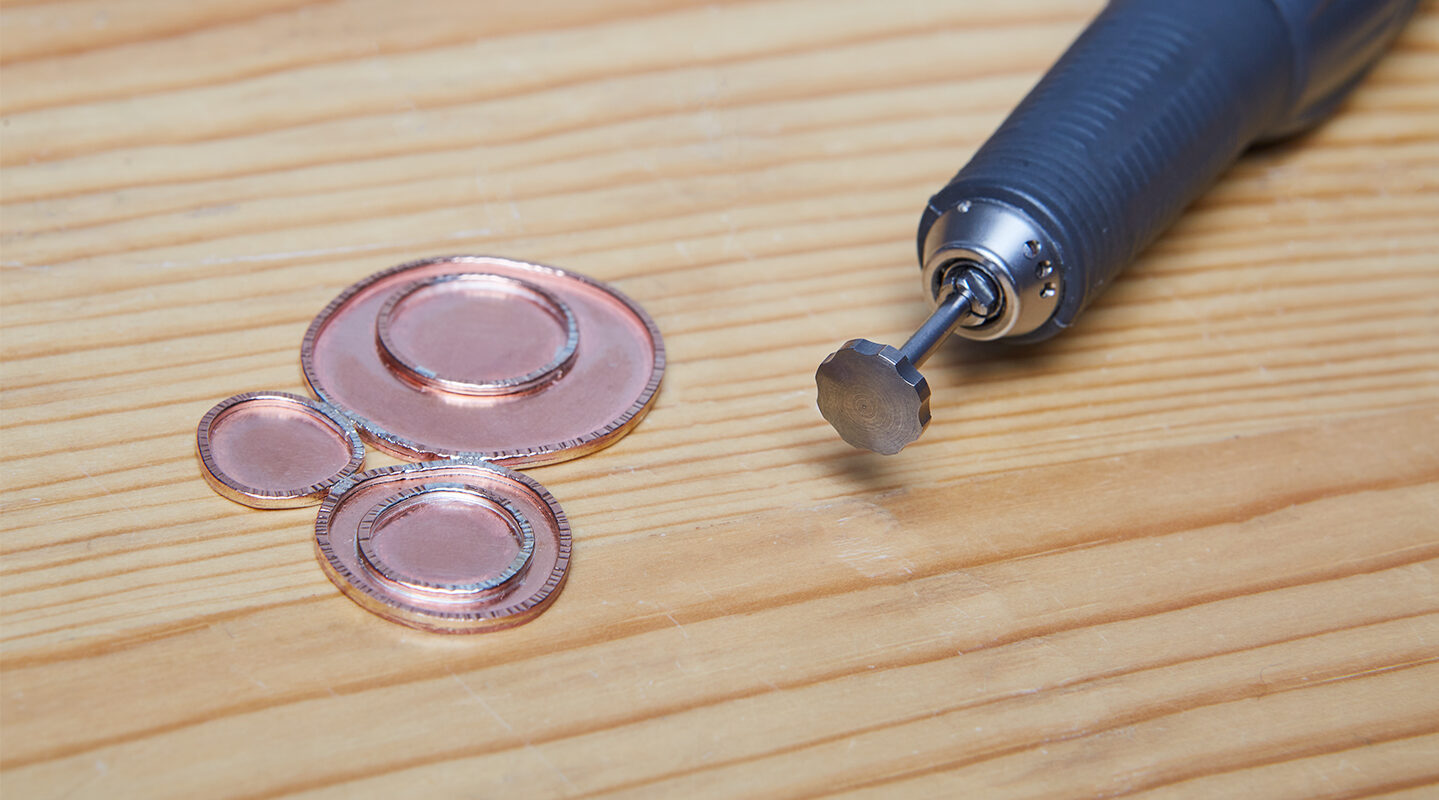
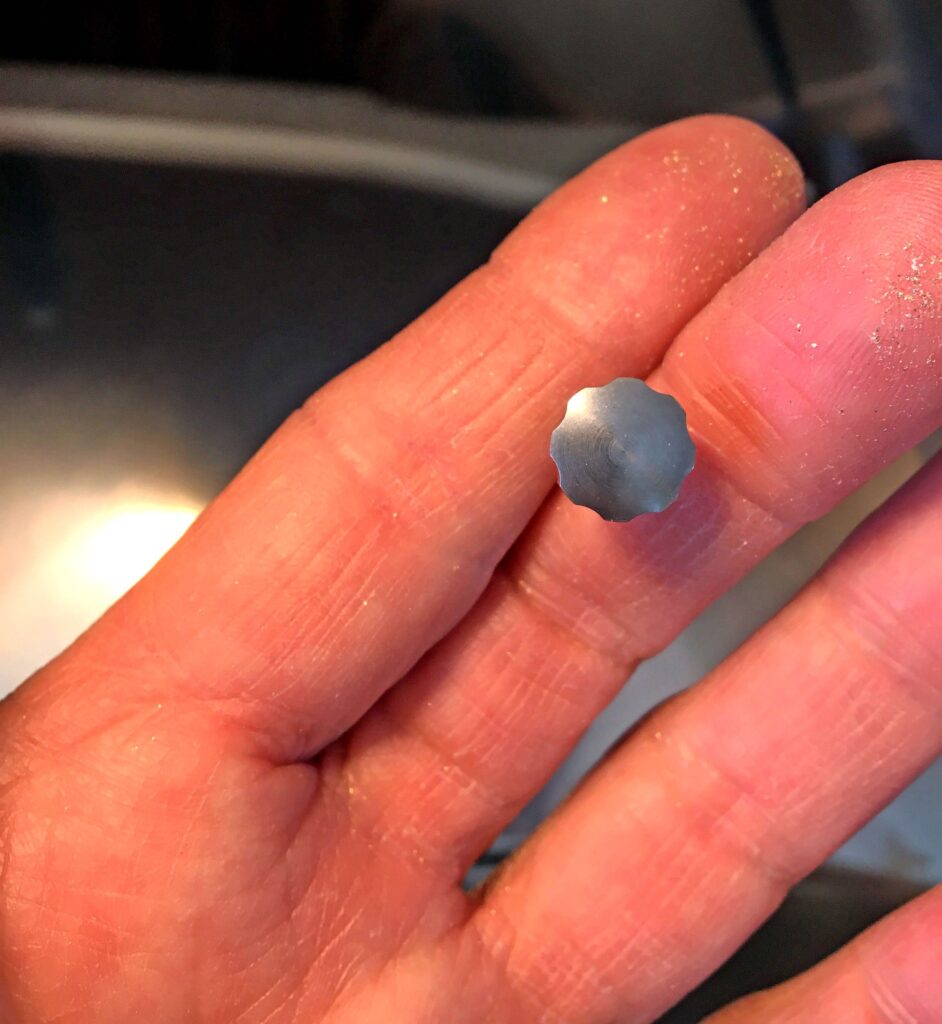
After I sawed out the forms, I loved the way this attachment burnished over that annoying little groove and burr at the base of the wire butt join and back sheet to create an invisible seam. To achieve this, I ran the hand piece slowly and let the hard steel head of the compactor rumble over those metal edges to burnish them down. The gently curved, star-like head of the compactor prevents “grabbing” unlike other ridged metal burs that I’ve used. And bonus: it won’t cut you either, as I discovered when I accidently ran it against my thumb. I intend to try this attachment on my next round of wax castings, because I’ll wager it will correct imperfections and smooth out mold marks at the same time so I really can’t wait to avoid that time-consuming job. I just love it when I discover a relatively simple but unknown-to-me tool that saves both time and effort and gives me the professional results I want.